« Laser Cut Usage » : différence entre les versions
Aller à la navigation
Aller à la recherche
| Ligne 1 : | Ligne 1 : | ||
= Step by Step = |
= Step by Step = |
||
# |
# Open your SVG file whith AI or Inkscape and check the cut configuration |
||
## No infill |
## No infill |
||
## Contour : Color (R:255 G:0 B:0), Thickness AI:0.0001in/Inkscape:0.01in |
## Contour : Color (R:255 G:0 B:0), Thickness AI:0.0001in/Inkscape:0.01in |
||
# Print (Ctrl+P), choose Trotec printer, your work will appear in the joblist in JobControl (JC) |
|||
# Print (Ctrl+P) |
|||
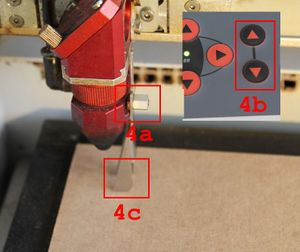
# Put material in the machine [[File:Laserfocuscal.jpg|thumb|Laser Focus Calibration]] |
# Put material in the machine [[File:Laserfocuscal.jpg|thumb|Laser Focus Calibration]] |
||
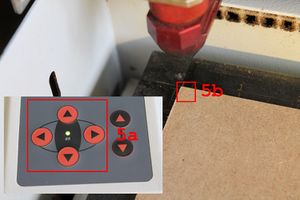
# Check focus calibration [[File:Lasersetorigin.jpg|thumb|Laser Set Origin]] |
# Check focus calibration [[File:Lasersetorigin.jpg|thumb|Laser Set Origin]] |
||
Version du 3 mai 2017 à 09:51
Step by Step
- Open your SVG file whith AI or Inkscape and check the cut configuration
- No infill
- Contour : Color (R:255 G:0 B:0), Thickness AI:0.0001in/Inkscape:0.01in
- Print (Ctrl+P), choose Trotec printer, your work will appear in the joblist in JobControl (JC)
- Put material in the machine
- Check focus calibration
- Set origin
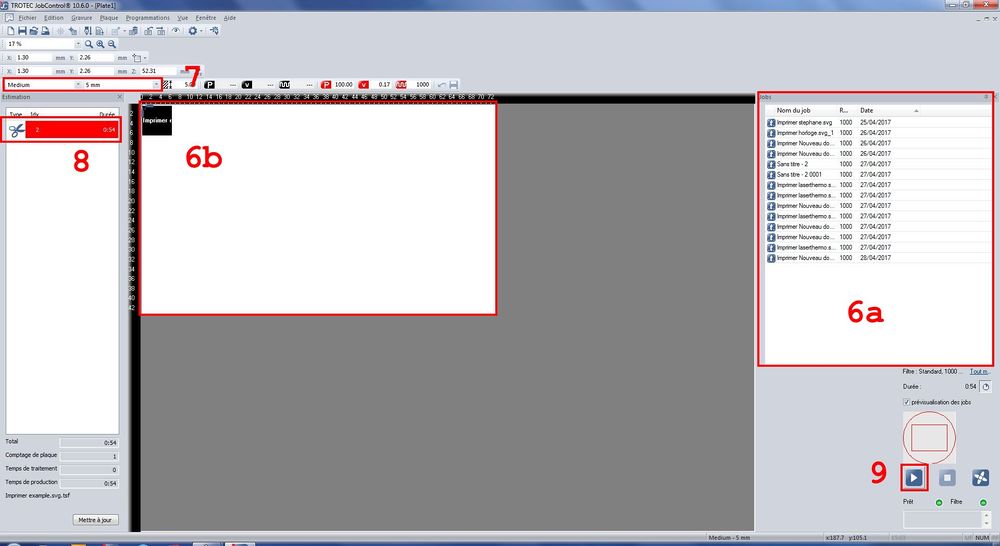
- In JobControl drag and drop your model from the Jobs list to the plate area.
- Check material configuration (with correct thickness)
- Check cutting time
- Start cutting
- Go outside the box until the end of the cutting.


